Palette
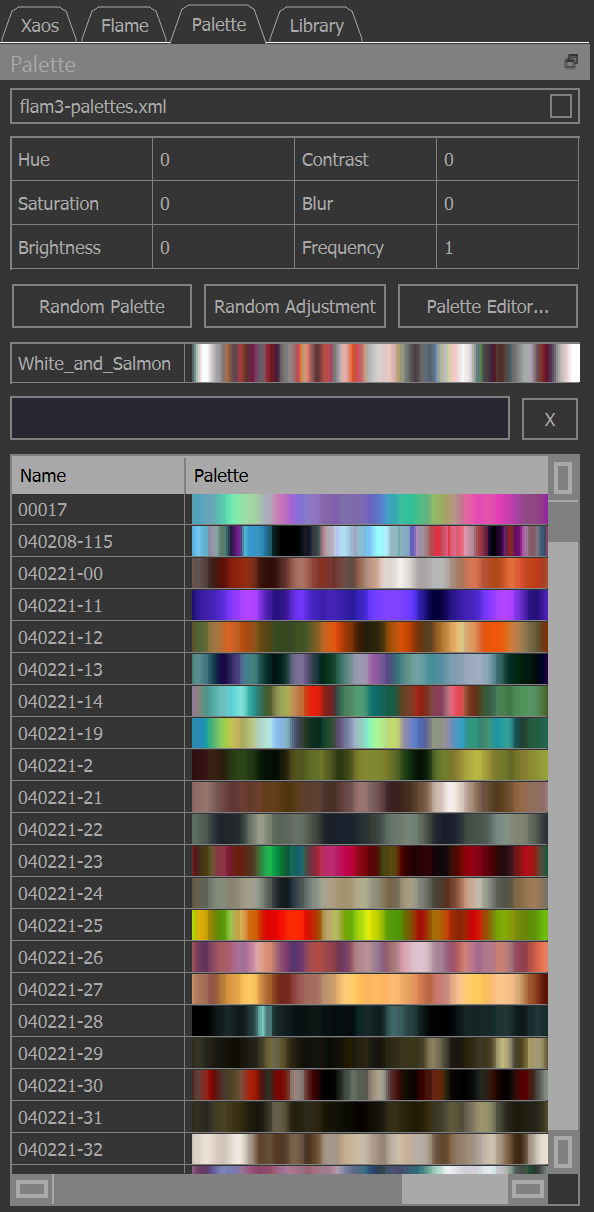
The palette tab shows the list of available palettes, optional adjustment values, final adjusted palette and the color curves.
Palette files combo box
On program startup, Fractorium loads all palette Xml files from its executable folder on Windows. On Linux, it searches:
~/.config/fractorium
/usr/share/fractorium
/usr/local/share/fractorium
All palette files which are successfully loaded from these folders will be displayed in the combo box at the top of this tab. Changing between these will update the list of palettes shown below to reflect what is in the currently selected file.
Adjustments
Adjustments are applied to the selected palette in the following order: frequency, hue, saturation, brightness, contrast, blur.
Double clicking a spinner will reset it to its default value.
Hue
The degrees to rotate the hue of the HSV representation of the RGB color by.
Range: -180 – 180
Saturation
The percentage to add to the saturation (intensity) component of the HSV representation of the RGB color.
Range: -100 – 100
Brightness
The value to add to each channel. Negative values bring it toward black, positive values toward white.
Range: -255 – 255
Contrast
The difference between the lightest and darkest colors in the palette. Negative values decrease the difference, and bring the colors toward gray. Positive values increase the difference and make the colors more saturated.
Range: -100 – 100
Blur
The width in pixels of the blurring.
Range: 0 – 127
Frequency
The number of times to repeat the palette.
Range: 1 – 10
Random palette
Select a random palette from the currently selected palette file.
Random adjustment
Apply a random set of adjustment values to the current palette.
Palette editor
Open the Palette Editor to make modifications to the palette as well as perform basic palette file management. Note that only user-created palettes from Fractorium are editable.
Palette preview
What the final adjusted palette looks like after applying adjustments to the currently selected palette. This is also shown on the Xforms Color tab for reference and is what’s used for iteration.
You can click and drag the palette preview to rotate it while seeing real-time updates on the output image.
Filter box
Type here to filter the shown palettes by name. Click the X button to clear the text.
Palette table
The full list of palettes in the currently selected palette file. Each palette is clickable.
Single click
Set the selected palette as the current one and apply the specified adjustments.
Double click
Set the selected palette as the current one and reset all adjustments.
Color curves are shown below the palette table. They give the user a way to do more fine grained adjustment of the colors on the final output image. Note that despite being placed on the Palette tab, they do not affect the palette. They are placed here because they are a global color adjustment similar to the Palette, so it makes sense to have all global color settings on one tab.
Reset curves
Reset the currently selected curve to its default position.
Hold Ctrl while clicking to reset all of the curves. This has the effect of disabling application of the color curves.
Color curves
This grid allows you to drag around the various color curves to do fine grained adjustment of the colors in the final output image. Since this does not reset the rendering process to the iteration stage, feedback is immediate.
Clicking on the curve in between the points adds a new point to the spline.
Right clicking on a point removes it.
The black line represents all colors, so dragging it will have the most dramatic effect. Use the individual color curves for a more targeted effect.
Render State: If early clip, density filtering, else final accumulation.
Curve radio buttons
To avoid dragging the wrong curve, you can only drag the curve which corresponds to the currently selected radio button.